

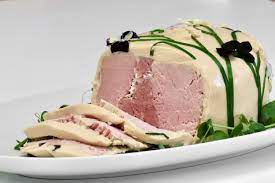
CHAUD FROID
Chaud froid, translated literally means hot – cold. This name refers to the fact that the sauce is cooked and is applied hot, but then chilled and served cold. The high gelatin content of the sauce makes it possible to apply it to an item while still warm and flowing. As the sauce cools, it gels and adheres to the product. It gives a smooth, pristine surface and seals the product from the air. Chaud – froid is a sauce that is applied to a product and is never served as an accompaniment or used to cook an item in like other sauces.
TYPES OF CHAUD FROID
The two primary methods of preparing Chaud froid are the classical and the contemporary methods.
THE CLASSICAL METHOD:
The classical method for chaud froid calls for the use of Béchamel or Veloute. This is reduced with a stock, suitable for the product that needs to be coated. This reduction is then fortified with a suitable aspic jelly and cream.
THE CONTEMPORY METHOD OF CHAUD FROID:
A modern variation of the sauce is prepared without a base of the roux. The result is a sauce, which has a less starchy mouth feel. The method is also faster to prepare.
VARIATIONS:
Chaud froid can be made in a variety of colors. Only natural ingredients must be used to obtain the colors using the basic colors. For a brown chaud – froid, replace the cream with a reduced jus. A green chaud – froid can be made by using spinach puree. Red chaud froid needs paprika plus tomato puree. Carrots, red peppers and even saffron are used to create a variety of colors.
APPLYING THE CHAUD FROID
There are a series of steps involved in the application of chaud froid.
- Preparing the item for coating
- Items to be coated should be well chilled. This helps to adhere the sauce to the surface. Chaud froid will run off the surface of a warm item before it can set.
- The surface of the food to be coated should be smooth and trimmed of any rough edges. It is not possible to create a smooth finish to a product if the under surface is rough and jagged.
- Surface grease must be removed before the coating of chaud froid is applied. The coating will not stick to a greasy surface. If there is a skin attached to the product, it should be removed. This will ensure that the fat and the grease are also removed.
- The item to be covered should be blotted/dabbed dry. This will allow better adhesion of the sauce.
- Tempering the Chaud Froid
Chaud froid sauce should be tempered before applying. Once the item has been properly prepped, the sauce may be tempered. This involves bringing the temperature of the sauce, either by heating or cooling, to a point that will allow the best and easiest coating. Gelling takes place at around 85°F. Normally, the closer you can maintain the sauce to this temperature without it getting too thick, the more evenly it will coat. In the ideal situation, it should take only 2 or 3 coats for a smooth and glistening finish.
If the sauce is too warm, it tends to wash over the item leaving only a thin layer of the sauce. If extremely warm, it might even melt the previous layers that have already been applied.
If the Chaud froid is too cold and thick, it will not form an even layer. The sauce will form lumps and might even leave air bubbles on the surface. The sauce will not coat the item smoothly, because it sets too quickly in runs.
A sauce that is tempered properly will be easily controled, it will give a smooth and even coating and it will make the application of the coating easier and more efficient.
- Ladle Method or Dipping Method?
There are two ways to apply a Chaud froid sauce. It can either be ladled onto the product r the item to be coated can be dipped into it. The ladling method is suitable for large joints or pieces of meat. Smaller items are more evenly coated by dipping. Also, unevenly shaped items are more easily coated by the dipping method. In each case, it is advisable to apply more than one coat of the sauce to give an even appearance and a smooth complete finish. Whichever method of coating is used, it is essential to refrigerate them between each coat and before the final trim.
- Trimming
Trimming is the final step in preparing the item for decoration. Carefully remove the item from the pan in which it was coated taking care not to rip the product away. The item should be cut away with the help of a palette knife being run around the base of the product. Preferably, dip the knife in hot water first. Line up the trimmed chaud – froid on a clean and fresh tray.
At this point, they are no longer items or products….they are now Chaud – froids. They now need only to be decorated before they can be set out on display.
- Decorating the Chaud – froids
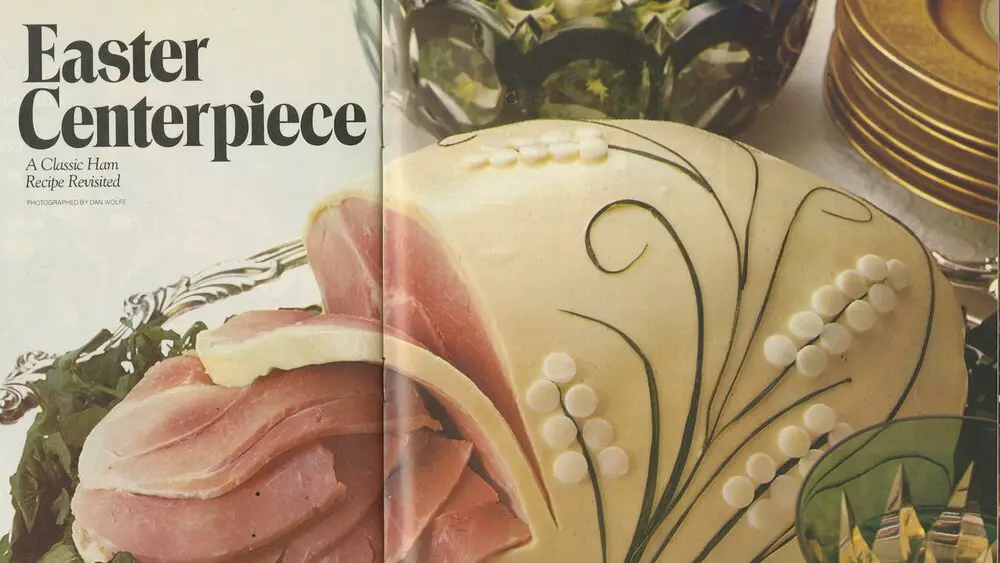
The Chaud – froids can now be decorated tastefully with a variety of food items. There are many choices available. Aspic cutters can be used to punch out a variety of shapes out of vegetables. These may be applied in pleasing patterns such as geometric shapes, floral or abstract.
A more natural, pleasing effect comes from using foods in their natural shapes. Capers, caviar, chives and slices of olives are a few examples. Each component must be dipped into warm aspic jelly and placed onto the surface of the chaud – froid. Avoid dripping excess aspic jelly onto the surface. These droplets of aspic are difficult and almost impossible to remove and can make the most beautiful designs look sloppy. After the decorated chaud – froids have been chilled; they are glazed with a single coat of well-tempered aspic jelly. This will protect the surface of the chaud – froid that could become dull and dry looking. The final glaze of aspic will keep the chaud – froid looking sparkling and fresh.
For Ihm Sem 1 food Production notes click here

